How to Choose the Right Size Studio Monitors for Your Recording Space
Are you a music producer or an aspiring recording artist? Are you looking to set up your own recording space but feeling overwhelmed with the wide range of studio monitor sizes available? Don’t worry, we understand the struggles you may be facing. In this blog post, we will walk you through the process of choosing the right size studio monitors for your recording space. Our aim is to provide you with the knowledge and guidance you need to make an informed decision that will enhance the quality of your music production. So, let’s dive in and find the perfect fit for your needs!
Understanding Studio Monitors
In the world of audio recording, studio monitors play a crucial role in ensuring the accuracy and quality of your recordings. While many may assume that any speakers can be used for this purpose, studio monitors are specifically designed for the task at hand. In this blog post, we will delve into what studio monitors are, their importance in the recording process, and how they impact the overall audio quality.
What are Studio Monitors?
Studio monitors, also known as reference monitors or studio speakers, are high-quality speakers designed to reproduce audio with accuracy and clarity. Unlike consumer speakers that may enhance certain frequencies to make music sound more pleasing to the ear, studio monitors aim to provide a neutral and uncolored sound reproduction. This allows engineers and producers to hear the audio as it truly is, enabling them to make informed decisions during the recording, mixing, and mastering processes.
The Importance of Studio Monitors
Accurate audio reproduction is crucial in professional audio production. Studio monitors serve as a critical tool in assessing the quality and balance of audio recordings. Here’s why they are of utmost importance:
- Precise Sound Reproduction: Studio monitors are designed to produce a flat frequency response, meaning they reproduce sound with minimal alteration across the entire audible spectrum. This allows you to hear the audio as it was intended, enabling you to make accurate judgments on factors such as tonal balance, dynamics, and spatial imaging.
- Detailed Monitoring: Studio monitors excel at delivering fine details in the audio, allowing you to hear subtle nuances that might otherwise go unnoticed on consumer-grade speakers. This level of detail is essential for audio professionals to make precise adjustments in their recordings and mixes.
- Consistency: Studio monitors are engineered to provide consistent and reliable sound reproduction. They are designed to maintain their accuracy even at different listening levels, ensuring that your mixes will translate well across various playback systems such as headphones, car audio, or club speakers.
- Reduced Listening Fatigue: By providing a neutral sound reproduction, studio monitors minimize listening fatigue that can occur when using speakers that overly emphasize certain frequencies. This allows you to work for extended periods without experiencing ear fatigue, leading to more productive and accurate monitoring sessions.
Choosing the Right Studio Monitors
When selecting studio monitors, there are several factors to consider:
- Size and Configuration: Studio monitors come in various sizes and configurations, including nearfield monitors (smaller speakers for close-range listening) and midfield monitors (larger speakers for more spacious control rooms). Consider the size of your studio and your specific monitoring needs when choosing the right size and configuration.
- Frequency Response: Look for monitors that provide a flat frequency response, meaning they reproduce sound without favoring any particular frequency range. This ensures accurate monitoring across the entire frequency spectrum.
- Power and Amplification: Consider the power and amplification capabilities of the studio monitors, ensuring they are suitable for your studio’s size and the volume levels you require.
- Additional Features: Some studio monitors offer additional features such as adjustable EQ settings, room correction, or built-in subwoofers. Consider these features based on your specific requirements and budget.
Factors to Consider When Choosing the Right Size Studio Monitors
Choosing the right size studio monitors is essential for achieving accurate and balanced sound reproduction in your studio setup. There are several factors that need to be considered when making this decision, including room size, speaker placement, frequency response, and budget. In this article, we will delve into each of these factors to help you make an informed choice.
Room Size
The size of your studio room plays a significant role in determining the appropriate size of studio monitors. Larger rooms generally require larger monitors to fill the space adequately and prevent sound from getting lost. Conversely, smaller rooms may benefit from smaller monitors to avoid overwhelming the space with excessive sound.
Consider the dimensions of your studio room and take note of any irregularities or acoustic challenges. It is also important to consider whether you will be using the studio for personal use or professional recording, as this may influence your decision. Here are some general guidelines to consider:
- Small rooms (up to 10 square meters): 5-inch or 6-inch studio monitors
- Medium rooms (10 to 20 square meters): 6-inch or 8-inch studio monitors
- Large rooms (20+ square meters): 8-inch or larger studio monitors
Speaker Placement
The placement of your studio monitors within the room is crucial for achieving an accurate and balanced monitoring environment. Proper speaker placement can help minimize acoustic issues and optimize the listening experience. Here are some key considerations:
- Position the monitors at an equal distance from each other and from the listening position to create an equilateral triangle.
- Angle the monitors slightly inward to direct the sound towards the listening position.
- Avoid placing the monitors too close to walls or corners, as this can cause unwanted bass buildup.
- Use monitor stands or isolation pads to decouple the monitors from the surface they are placed on, reducing vibrations and improving clarity.
Frequency Response
The frequency response of studio monitors refers to the range of frequencies that the monitors can reproduce accurately. It is important to choose monitors that have a balanced frequency response, as this will ensure that your mixes translate well across different playback systems.
When considering frequency response, keep the following in mind:
- Look for monitors that have a flat frequency response, meaning that they reproduce all frequencies accurately without emphasizing or de-emphasizing any particular range.
- Consider the low-frequency extension of the monitors. If you work with bass-heavy genres, you may prefer monitors that can reproduce lower frequencies more accurately.
- Pay attention to the high-frequency response as well. Monitors with extended high-frequency capabilities can provide more detail and clarity in your mixes.
Budget
Budget is an important consideration when choosing the right size studio monitors. While it is tempting to go for the most expensive and high-end options, it is crucial to find a balance between quality and affordability. Here are some options to consider based on different budget ranges:
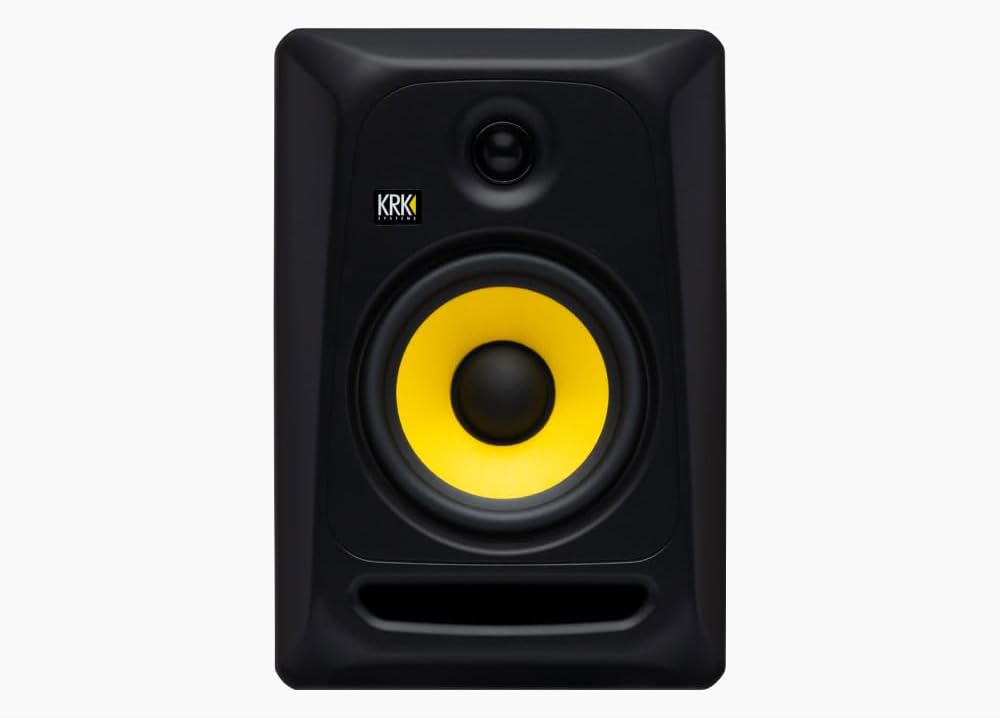
- Entry-level budget: KRK Rokit 5 G4, JBL 305P MkII
- Mid-range budget: Yamaha HS8, Adam Audio T7V
- High-end budget: Genelec 8040B, Focal Shape 65
Remember that while budget is a consideration, it should not be the sole determinant of your decision. It is important to listen to different monitors within your budget range and make a decision based on their sound quality, rather than solely relying on brand reputation or price tag.
In conclusion, choosing the right size studio monitors involves considering factors such as room size, speaker placement, frequency response, and budget. By carefully evaluating these factors and understanding their impact on your studio setup, you can make an informed decision that will result in accurate and balanced sound reproduction.
Matching Monitor Size to Room Size
When setting up a recording studio, one important factor to consider is the size of your room and how it should influence your choice of studio monitor size. Selecting the right monitor size for your space is crucial for achieving accurate and balanced audio reproduction. In this blog post, we will provide guidelines on matching monitor size to room dimensions and discuss the potential implications of using monitors that are either too large or too small for your space.
Why Room Size Matters
The size of your recording space plays a significant role in determining the appropriate monitor size. A larger room requires monitors that can adequately fill the space with sound, while a smaller room necessitates monitors that can deliver precise audio without overwhelming the room. Choosing the wrong monitor size can result in a distorted perception of the sound and inaccurate mixing decisions.
Matching Monitor Size to Room Dimensions
To ensure optimal sound reproduction in your studio, you should consider the following guidelines when choosing the appropriate monitor size based on your room dimensions:
- Small Rooms: If you have a small recording space, such as a home studio or a bedroom, monitors with a compact size would be ideal. Consider near-field monitors, which are designed for close listening distances and have a smaller footprint. These monitors are well-suited for smaller rooms as they provide accurate sound reproduction without overpowering the space. Some popular models for small rooms include:
- Yamaha HS5
- KRK Rokit 5 G4
- JBL 305P MkII
- Medium Rooms: For medium-sized studios, you have more flexibility in monitor size options. Medium-sized rooms can accommodate larger monitors without compromising the audio quality. Near-field or mid-field monitors ranging from 6 to 8 inches are commonly used in these scenarios. Some options worth considering for medium rooms include:
- Adam Audio T7V
- Focal Shape 65
- Genelec 8040B
- Large Rooms: In larger studios or professional recording spaces, larger monitors are often preferred to fill the room with sound and maintain balanced audio reproduction at a distance. These far-field monitors typically have a size range of 8 to 10 inches or more. Some recommended models for large rooms include:
- Neumann KH 310
- Dynaudio LYD 48
- Barefoot Sound MicroMain27 Gen2
Implications of Using the Wrong Monitor Size
Using monitors that are either too large or too small for your room can lead to various issues, including:
- Overwhelming the Room: If you place large monitors in a small room, the excessive sound pressure can create acoustic problems, such as excessive bass buildup or reflections, leading to an inaccurate listening experience.
- Lack of Low-End Response: Small monitors may struggle to reproduce the lower frequencies accurately, resulting in a weak or imbalanced bass response. This can impact the overall mix and lead to poor decision-making during the mixing process.
- Loss of Detail: Using monitors that are too small for a large room may result in a loss of detail and imaging accuracy, particularly at a distance. This can affect the precision of your mixes and compromise the overall quality of your recordings.
By matching the monitor size to your room dimensions, you can enhance the accuracy and clarity of your audio monitoring, ultimately leading to better mixing decisions and high-quality recordings.
Remember, your room’s acoustic treatment is another crucial factor to consider when setting up your studio. Proper acoustic treatment can significantly influence the performance of your monitors and the overall sound quality in your room.
Take the time to evaluate your room size, consider the monitor size options available, and make an informed decision to create an optimal monitoring environment for your studio.
Listening and Testing
When it comes to setting up a professional audio studio, one of the most crucial decisions you’ll have to make is choosing the right studio monitors. These speakers play a vital role in accurately reproducing the sound and ensuring that your mixes translate well across different playback systems. However, with a wide range of options available in the market, it can be overwhelming to make the right choice. This is where the importance of listening and testing different studio monitor sizes becomes paramount. In this blog post, we will explore why listening and testing are crucial steps and provide valuable tips to help you make an informed decision.
Why Listening and Testing Matter
- Accurate Sound Reproduction: Studio monitors are designed to reproduce audio signals with high fidelity and accuracy. However, each monitor size has its own unique characteristics that can significantly impact the sound reproduction. By listening and testing different sizes, you can identify the one that best suits your needs and ensures accurate audio representation.
- Room Acoustics: The size and layout of your studio space can greatly affect the way sound interacts with the environment. Different monitor sizes have varying dispersion patterns, bass response, and frequency responses. By testing different sizes in your specific room, you can determine which monitor size performs optimally in your space and compensates for any acoustic anomalies.
- Personal Preference: Everyone’s ears are unique, and what sounds great to one person may not necessarily sound the same to another. By listening and testing different monitor sizes, you can find the one that matches your personal listening preferences. This will allow you to work comfortably and confidently, knowing that you’re hearing the audio accurately.
Conducting Critical Listening Tests
To ensure that you choose the right studio monitor size, it’s essential to conduct critical listening tests. Here are some tips to help you get the most out of your testing process:
- Select a Representative Audio Material: Choose a selection of audio material that represents the type of work you’ll be doing in your studio. This can include tracks with a wide dynamic range, different genres, and elements that highlight the specific aspects you’re interested in evaluating.
- Create a Listening Environment: Set up your studio space to minimize external noise and distractions. Ensure that the monitors are positioned correctly and that you’re sitting in the optimal listening position (commonly known as the “sweet spot”).
- Listen to Familiar Material: Start by playing audio material that you are intimately familiar with. This can be music or soundtracks that you’ve listened to on various systems. Pay attention to the details and nuances that you would expect to hear.
- Compare Different Monitor Sizes: Switch between different monitor sizes while listening to the same audio material. Take note of any differences in soundstage, imaging, detail, and bass response. This will help you identify the monitor size that best meets your requirements.


Seeking Professional Advice
In some cases, seeking professional advice can be beneficial, especially if you’re unsure about which monitor size to choose. Here are some instances where consulting an audio professional can help:
- Studio Designers: If you’re setting up a new studio or renovating an existing one, consulting a studio designer can provide valuable insights into selecting the right monitor size based on your room dimensions and acoustic treatment.
- Audio Engineers or Producers: If you’re working closely with audio engineers or producers, they can offer guidance based on their experience with different monitor sizes. They can help you understand how specific brands or models perform in real-world scenarios.
- Audio Retailers: Visit local audio retailers who have dedicated listening rooms or demo facilities. They often have a range of studio monitors available for testing, allowing you to compare different sizes side by side.
In conclusion, when choosing the right studio monitor size, it is of utmost importance to listen and test different options. By conducting critical listening tests and seeking professional advice when needed, you can ensure that you make an informed decision that will enhance the accuracy and quality of your audio productions. So take the time to listen and test before making your final choice, and let your ears guide you towards the perfect studio monitor size for your needs.
Final Thoughts and Recommendations
In conclusion, selecting the appropriate size studio monitors for your recording space requires careful consideration of various factors. You must take into account the dimensions of the room, the placement of the speakers, the frequency response, and your budget. It is crucial to match the monitor size with the room size to achieve accurate sound reproduction. Furthermore, it is recommended to listen and test different options before making a final decision. By following these guidelines, you can guarantee that your studio monitors are perfectly suited to your recording space and will enhance the quality of your audio production.


I’ve heard that room treatment is also important for achieving accurate monitoring. Can anyone share their experience with this?
Absolutely, room treatment plays a crucial role in achieving accurate monitoring. Acoustic panels, bass traps, and diffusers can help minimize reflections and resonances in the room, resulting in a more balanced sound. Has anyone tried room treatment in their studio? What improvements did you notice?
I’ve always wondered if it’s better to have larger monitors for better bass response. Can someone shed some light on this?
Having larger monitors can indeed provide better bass response, as larger drivers are capable of moving more air and producing lower frequencies with greater accuracy. However, it’s important to consider the size of your room as well. In a smaller space, larger monitors may overpower the room and result in an unbalanced sound. It’s all about finding the right balance for your specific setup.
I’m glad to hear that upgrading your studio monitors improved your mixes! It really does make a difference. Did you find any specific factors or measurements helpful when choosing the right size monitors?
I have a small home studio and I’m wondering if I can get away with using smaller studio monitors. Will it affect the sound quality?
In a small home studio, using smaller studio monitors can still provide good sound quality. However, it’s important to choose monitors with sufficient frequency response and power to accurately reproduce the audio. Have you measured the dimensions of your room? That can help determine the ideal monitor size for your space.
What are some good brands to consider when looking for studio monitors? I’m in the market for new ones and could use some recommendations.
There are several reputable brands in the market for studio monitors. Some popular options include Yamaha, KRK, Adam Audio, and Genelec. It’s always a good idea to listen to different models before making a decision, as the sound can vary between brands and models. Do you have any specific requirements or price range in mind?
I recently upgraded my studio monitors and it made such a difference in my mixes! Definitely agree that matching the monitor size to the room size is crucial.