
How to Bias Your Tube Amp for Perfect Tone
The “How to Bias Your Tube Amp for Perfect Tone” guide provides a step-by-step process to help you optimize the performance of your electric guitar tube amp. By adjusting the bias, you can achieve the perfect tone, enhancing the overall sound quality and clarity of your amplifier. This guide offers a comprehensive overview to help you navigate the biasing process effectively.
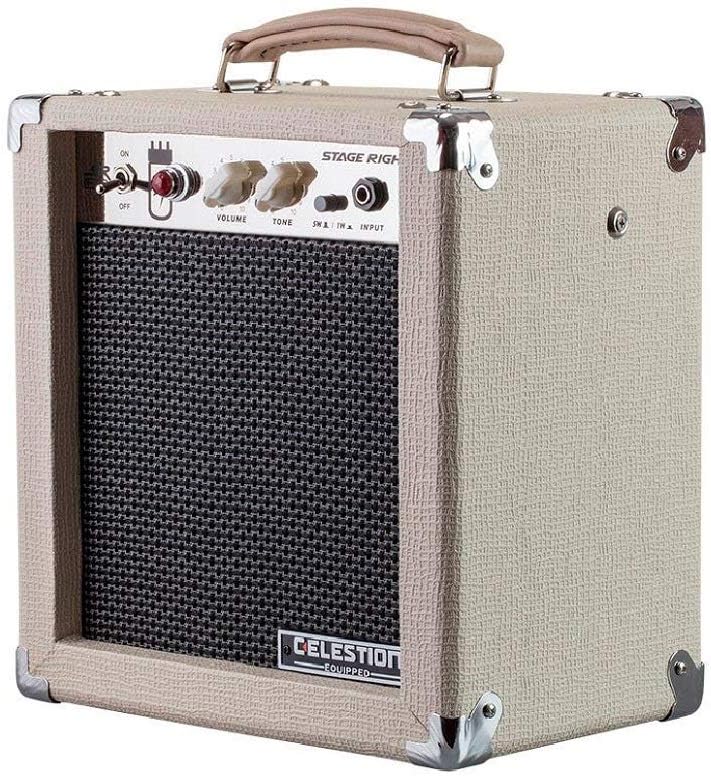
Top-Rated Tube Amps for Electric Guitar


Understanding Tube Amp Biasing
Tube amp biasing is a critical aspect of achieving optimal tone and performance in your amplifier. Biasing refers to setting the proper operating conditions for the tubes in your amp, specifically the bias voltage. This voltage ensures that the tubes are operating within their intended range and that they are biased to produce the desired tonal characteristics.
Proper biasing is essential because it affects not only the sound but also the lifespan of your tubes. When the bias voltage is set correctly, the tubes operate at their optimal levels, resulting in a balanced and clear sound. This allows the amplifier to reach its full potential and deliver the desired tone.
On the other hand, incorrect biasing can lead to a range of issues. If the bias voltage is set too high, the tubes can run hot and may wear out faster. This can cause a decrease in tonal quality, increased distortion, or even premature tube failure. Conversely, if the bias voltage is set too low, the tubes may not reach their intended operating range, resulting in a weak or dull sound. Incorrect biasing can also lead to increased power consumption, reduced output power, and potential damage to other components in the amplifier.
To ensure proper biasing, it is crucial to follow the manufacturer’s guidelines or consult a qualified technician. The process typically involves measuring the bias voltage and adjusting it within the specified range. It is important to use a suitable biasing method and appropriate tools to accurately measure and adjust the bias voltage. Regular maintenance and periodic bias checks are recommended to maintain optimal performance and prolong the lifespan of your tubes.
Remember, correct tube amp biasing is an integral part of achieving the best possible tone and ensuring the longevity of your amplifier. Taking the time to understand and implement proper biasing techniques will help you get the most out of your tube amplifier while minimizing the risks associated with incorrect biasing.


Gather Necessary Tools and Equipment
To bias your tube amp, you will need a few essential tools and equipment. Here is a list of what you will need:
- Multimeter: This device is crucial for measuring the voltage and current in your tube amp. Make sure it is capable of measuring both DC voltage and milliamperes.
- Screwdriver: A screwdriver with the appropriate size and type is necessary to access the bias adjustment potentiometers on your amp. It is important to have a good quality screwdriver to avoid damaging delicate components.
- Bias probe: A bias probe is used to safely measure the bias voltage in your tube amp. It acts as a buffer between the multimeter and the amplifier, ensuring accurate readings without introducing any risk to the user or the equipment.
- Biasing guide/manual: It is highly recommended to have the specific biasing guide or manual for your tube amplifier model. This will provide you with the manufacturer’s recommended bias voltage range and any specific instructions or precautions to follow during the biasing process.
Additionally, it is always a good idea to have a clean and well-lit workspace, as well as a notepad and pen to record your measurements and settings for future reference. Remember to follow all safety precautions and consult the manufacturer’s documentation for any specific requirements or recommendations related to biasing your tube amp.
Preparing Your Tube Amp
To safely turn off and unplug your tube amp, remove the amp’s chassis, and locate the bias adjustment points, follow these clear, easy-to-follow instructions:
- Turning off and unplugging your tube amp:
- Before starting any work on your tube amp, switch the power off by turning the power switch to the “off” position. This will ensure that the amp is completely powered down.
- After switching off the amp, unplug it from the power source by safely removing the power cord from the wall socket or power strip. This step is crucial to prevent any potential electric shock or damage.
- Removing the amp’s chassis:
- Locate and remove the screws or fasteners securing the chassis to the amp’s enclosure. These screws are typically found on the top or bottom of the amp.
- Carefully lift the chassis out of the enclosure, ensuring that you have a firm grip and support it from underneath. Some larger tube amps may require assistance or additional support during this step.
- Place the chassis on a stable and safe work surface, making sure it is protected from any potential scratches or damage.
- Locating the bias adjustment points:
- Look for the bias adjustment points on the circuit board inside the chassis. These points are usually labeled and can vary depending on the specific amp model.
- Once you have located the bias adjustment points, familiarize yourself with their appearance and location on the circuit board. Take note of any specific instructions or guidelines provided in the amp’s manual regarding the bias adjustment process.
Remember, working with tube amps can be potentially dangerous if not handled correctly. Always exercise caution, follow the manufacturer’s instructions, and consider seeking assistance from a qualified technician if you are unsure about any aspect of the process.
Measuring and Adjusting Bias
To attach the bias probe, measure the current bias, and make necessary adjustments using the bias adjustment points, follow these steps:
- Prepare the necessary tools: Before you begin, ensure that you have the following tools ready: bias probe, screwdriver (matching the bias adjustment points), and a multimeter.
- Power off the equipment: Make sure that the equipment you are working on is powered off and unplugged. This is crucial for your safety.
- Locate the bias adjustment points: Identify the bias adjustment points on the equipment. They are typically labeled “BIAS” or “BIAS ADJUST” and can be found near the power tubes.
- Connect the bias probe: Attach the bias probe to the multimeter. Connect the positive probe to the “+” terminal and the negative probe to the “-” terminal.
- Set the multimeter: Set the multimeter to measure DC voltage and select an appropriate range. Refer to the equipment’s manual for the recommended range.
- Attach the bias probe to the bias adjustment points: Gently attach the bias probe to the bias adjustment points on the equipment. Ensure a secure connection.
- Power on the equipment: Plug in the equipment and power it on. Allow it to warm up for a few minutes to stabilize the bias.
- Measure the bias voltage: With the equipment powered on and warmed up, carefully touch the bias probe to the bias adjustment points. Read the voltage displayed on the multimeter. This voltage represents the current bias.
- Adjust the bias: If the measured bias voltage is outside the recommended range, use the screwdriver to make necessary adjustments to the bias adjustment points. Turn the screwdriver clockwise to increase the bias voltage or counterclockwise to decrease it. Make small adjustments and re-measure the bias voltage after each adjustment.
- Recheck and finalize: After making adjustments, recheck the bias voltage to ensure it falls within the recommended range. Repeat the adjustment process if necessary.
Remember to always refer to the equipment’s manual for specific instructions and safety precautions.
Verifying and Testing Bias
To recheck the bias after adjustments, follow these steps:
- Power off the amplifier: Ensure the amplifier is turned off and disconnected from any power source before proceeding with any adjustments.
- Locate the bias adjustment points: Identify the bias adjustment points on the amplifier’s circuit board or by referring to the amplifier’s user manual or schematic diagram.
- Measure the bias voltage: Connect a multimeter set to DC voltage mode to the bias adjustment points. Ensure the multimeter’s probes are correctly connected to the amplifier’s bias points.
- Adjust the bias: If necessary, make small adjustments to the bias potentiometer using a small screwdriver or a suitable tool. Follow the manufacturer’s guidelines or recommendations for the appropriate bias range.
- Recheck the bias voltage: Repeat the measurement of the bias voltage using the multimeter. Ensure that the bias voltage falls within the recommended range specified by the manufacturer.
To test the amp’s functionality, perform the following steps:
- Connect the amplifier: Connect the amplifier to the appropriate power source and speaker cabinet, ensuring all connections are secure.
- Power on the amplifier: Turn on the amplifier and allow it to warm up for a few minutes to stabilize the circuitry.
- Test the clean tone: Play a clean signal through the amplifier and check for any abnormalities or unwanted noise. Ensure that the volume and tone controls are set to neutral positions.
- Test the gain and distortion: Gradually increase the gain control while playing your instrument. Monitor the sound for any distortion or excessive noise. Adjust the gain to achieve the desired level of distortion without sacrificing tone quality.
- Check all controls and features: Test all the amplifier’s controls, such as EQ, presence, reverb, and any other available features, to ensure they are functioning correctly.
To ensure the desired tone is achieved, follow these steps:
- Experiment with EQ controls: Adjust the amplifier’s equalization controls, such as bass, midrange, and treble, to shape the tone to your preference. Start with neutral settings and make small adjustments while playing your instrument to find the desired tonal balance.
- Utilize tone-shaping knobs and switches: If your amplifier has additional tone-shaping features like contour knobs or switches, experiment with them to further refine your tone.
- Test different input/output options: If your amplifier offers multiple input or output options (e.g., high/low gain inputs, effects loop), try different combinations to find the one that best suits your instrument and playing style.
- Experiment with speaker cabinets: If your amplifier allows for speaker cabinet swapping, try different cabinets to achieve different tonal characteristics and find the one that suits your preferences.
Remember to take your time during the process, carefully listening and adjusting until you achieve the desired tone.
Reassembling Your Tube Amp
To safely put back the amp’s chassis, follow these step-by-step instructions:
- Prepare the work area: Ensure you have a clean and well-lit workspace. Place a soft cloth or towel on the surface to protect the amp from scratches.
- Align the chassis: Carefully position the chassis over the empty amp cabinet, ensuring that all the screw holes align with the corresponding holes in the cabinet. Take your time to ensure proper alignment.
- Secure the chassis: Insert and tighten all the screws, starting from one corner and gradually working your way around. Use a screwdriver appropriate for the screw type and size to avoid damage. Be cautious not to overtighten, as it may strip the screw or damage the cabinet.
- Double-check connections: Carefully inspect all the connections inside the amp. Ensure that all cables, wires, and connectors are properly seated and secure. Pay special attention to any high-voltage connections, such as those involving the power transformer and output transformer.
- Test the amp: Before powering on the amp, it is essential to perform a final check to ensure everything is in order. Connect the amp to a proper power source and turn it on. Verify that all controls, switches, and indicators are functioning correctly. Listen for any abnormal noises or hums and check for any strange smells, indicating potential issues.
- Play through the amp: Connect your guitar or any audio source to the amp and play a test signal. Gradually increase the volume to ensure that all the tubes, speakers, and circuitry are working as expected. Pay attention to any distortion, noise, or other irregularities.
By following these instructions, you can safely reassemble your tube amp, ensuring that all connections are secure and functioning properly. Remember to exercise caution and seek professional help if you encounter any difficulties or uncertainties during the process.
Summary and Takeaways
In conclusion, properly biasing your tube amp is crucial for achieving the perfect tone. Throughout this guide, we have discussed the importance of understanding the basics of biasing and how it can significantly impact the sound of your amplifier. By following the steps outlined and taking the time to experiment with different settings, you can unlock the full potential of your tube amp.
However, it is essential to proceed with caution when biasing your amp. Working with high voltages can be dangerous, so it is always advisable to consult a professional if you are unsure or uncomfortable with the process. Remember to prioritize safety and never compromise on it.
With the right knowledge and care, you can optimize the performance of your tube amp and elevate your playing experience to new heights. So take the time to learn, experiment, and enjoy the journey of biasing your tube amp for that perfect tone.

![Best Stereo Receivers for Superior Sound Quality in 2024 [TOP 6 Picks]](https://forthecountryrecord.com/wp-content/uploads/2024/02/sonystrdh59052channelsurroundsoundreceiver-768x253.jpg)


I followed this guide and was able to bias my tube amp perfectly. The difference in tone is incredible! My guitar sounds so much richer and more dynamic now. Thank you for providing such clear and detailed instructions!
I have been using this guide for quite some time now and I must say it’s been a game-changer for me. I used to struggle with getting the right tone on my tube amp, but after learning how to bias it properly, I’ve been able to achieve that perfect tone I’ve always wanted. Highly recommended!
Thank you for your positive feedback! I’m glad to hear that the guide has been helpful to you. It’s always rewarding to know that others have benefited from the information provided. Keep enjoying your perfectly biased tube amp!
This guide is fantastic! I would love to see a future article on how to troubleshoot common issues related to tube amp biasing. It would be great to have some troubleshooting tips and techniques to help identify and fix any biasing problems that may arise.
Thank you for your suggestion! I appreciate your feedback and will certainly consider writing an article on troubleshooting common issues related to tube amp biasing. It’s a great topic to explore and provide guidance on. Stay tuned for future articles!